Saved Model
A SavedModel contains a complete TensorFlow program, including weights and computation. It does not require the original model building code to run, which makes it useful for sharing or deploying (with TFLite, TensorFlow.js, TensorFlow Serving, or TensorFlow Hub).
If you have code for a model in R and merely want to load weights into it, see the guide to training checkpoints.
Creating a SavedModel from Keras
For a quick introduction, this section exports a pre-trained Keras model and serves image classification requests with it. The rest of the guide will fill in details and discuss other ways to create SavedModels.
library(keras)
library(tensorflow)

physical_devices <- tf$config$experimental$list_physical_devices('GPU')
if (length(physical_devices) != 0)
  tf$config$experimental$set_memory_growth(physical_devices[[1]], TRUE)
We’ll use an image of Grace Hopper as a running example, and a Keras pre-trained image classification model since it’s easy to use. Custom models work too, and are covered in detail later.
file <- get_file(
    "grace_hopper.jpg",
    "https://storage.googleapis.com/download.tensorflow.org/example_images/grace_hopper.jpg")
library(magick)
#> Linking to ImageMagick 6.9.9.39
#> Enabled features: cairo, fontconfig, freetype, lcms, pango, rsvg, webp
#> Disabled features: fftw, ghostscript, x11
img <- image_read(file)
img <- image_draw(img)
img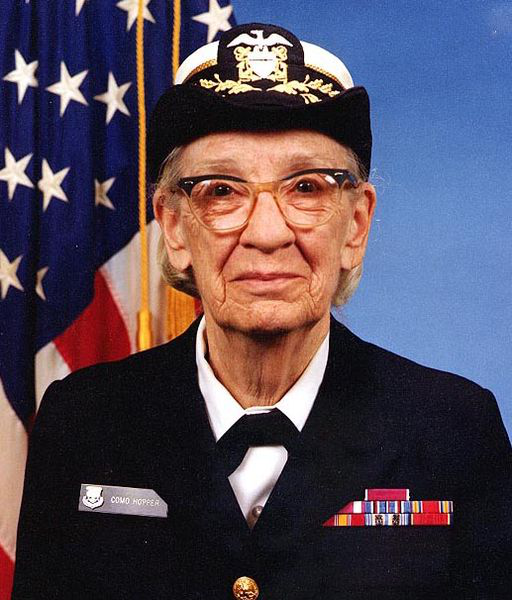
x <- image_load(file, target_size = list(224, 224)) %>%
  image_to_array() %>%
  mobilenet_preprocess_input
dim(x) <- c(1, dim(x))
pretrained_model <- tf$keras$applications$MobileNet()
result_before_save <- pretrained_model(x)
preds <- imagenet_decode_predictions(as.matrix(result_before_save))The save-path follows a convention used by TensorFlow Serving where the last path component (1/ here) is a version number for your model - it allows tools like Tensorflow Serving to reason about the relative freshness.
SavedModels have named functions called signatures. Keras models export their forward pass under the serving_default signature key. The SavedModel command line interface (see below) is useful for inspecting SavedModels on disk:
We can load the SavedModel back into Python with tf.saved_model.load and see how Admiral Hopper’s image is classified.
loaded <- tf$saved_model$load("/tmp/mobilenet/1/")
loaded$signatures$keys()  # ["serving_default"]
#> KeysView(_SignatureMap({'serving_default': <tensorflow.python.saved_model.load._WrapperFunction>}))
Imported signatures always return dictionaries.
infer <- loaded$signatures["serving_default"]
infer$structured_outputs
#> $act_softmax
#> TensorSpec(shape=(None, 1000), dtype=tf.float32, name='act_softmax')
Running inference from the SavedModel gives the same result as the original model.
labeling <- infer(tf$constant(x, dtype = tf$float32))[pretrained_model$output_names[1]]
imagenet_decode_predictions(as.matrix(labeling[[1]]))
#> [[1]]
#>   class_name class_description       score
#> 1  n03763968  military_uniform 0.701242745
#> 2  n02883205           bow_tie 0.186902404
#> 3  n04350905              suit 0.026838219
#> 4  n02817516          bearskin 0.021798020
#> 5  n03929855       pickelhaube 0.008993604
The SavedModel format on disk
A SavedModel is a directory containing serialized signatures and the state needed to run them, including variable values and vocabularies.
The saved_model.pb file stores the actual TensorFlow program, or model, and a set of named signatures, each identifying a function that accepts tensor inputs and produces tensor outputs.
SavedModels may contain multiple variants of the model (multiple v1$MetaGraphDefs, identified with the –tag_set flag to saved_model_cli), but this is rare.
The variables directory contains a standard training checkpoint (see the guide to training checkpoints).
The assets directory contains files used by the TensorFlow graph, for example text files used to initialize vocabulary tables. It is unused in this example.
SavedModels may have an assets$extra directory for any files not used by the TensorFlow graph, for example information for consumers about what to do with the SavedModel. TensorFlow itself does not use this directory.
Load a SavedModel in C++
The C++ version of the SavedModel loader provides an API to load a SavedModel from a path, while allowing SessionOptions and RunOptions. You have to specify the tags associated with the graph to be loaded. The loaded version of SavedModel is referred to as SavedModelBundle and contains the MetaGraphDef and the session within which it is loaded.
Details of the SavedModel command line interface
You can use the SavedModel Command Line Interface (CLI) to inspect and execute a SavedModel. For example, you can use the CLI to inspect the model’s SignatureDefs. The CLI enables you to quickly confirm that the input Tensor dtype and shape match the model. Moreover, if you want to test your model, you can use the CLI to do a sanity check by passing in sample inputs in various formats (for example, Python expressions) and then fetching the output.
Install the SavedModel CLI
Broadly speaking, you can install TensorFlow in either of the following two ways:
- By installing a pre-built TensorFlow binary.
- By building TensorFlow from source code.
If you installed TensorFlow through a pre-built TensorFlow binary, then the SavedModel CLI is already installed on your system at pathname bin/saved_model_cli.
If you built TensorFlow from source code, you must run the following additional command to build saved_model_cli:
Overview of commands
The SavedModel CLI supports the following two commands on a SavedModel:
-
show, which shows the computations available from aSavedModel. -
run, which runs a computation from aSavedModel.
show command
A SavedModel contains one or more model variants (technically, v1.MetaGraphDefs), identified by their tag-sets. To serve a model, you might wonder what kind of SignatureDefs are in each model variant, and what are their inputs and outputs. The show command let you examine the contents of the SavedModel in hierarchical order. Here’s the syntax:
usage: saved_model_cli show [-h] --dir DIR [--all]
[--tag_set TAG_SET] [--signature_def SIGNATURE_DEF_KEY]
For example, the following command shows all available tag-sets in the SavedModel:
The following command shows all available SignatureDef keys for a tag set:
If there are multiple tags in the tag-set, you must specify all tags, each tag separated by a comma. For example:
To show all inputs and outputs TensorInfo for a specific SignatureDef, pass in the SignatureDef key to signature_def option. This is very useful when you want to know the tensor key value, dtype and shape of the input tensors for executing the computation graph later. For example:
To show all available information in the SavedModel, use the –all option. For example:
run command
Invoke the run command to run a graph computation, passing inputs and then displaying (and optionally saving) the outputs. Here’s the syntax:
usage: saved_model_cli run [-h] --dir DIR --tag_set TAG_SET --signature_def
                           SIGNATURE_DEF_KEY [--inputs INPUTS]
                           [--input_exprs INPUT_EXPRS]
                           [--input_examples INPUT_EXAMPLES] [--outdir OUTDIR]
                           [--overwrite] [--tf_debug]
The run command provides the following three ways to pass inputs to the model:
-
--inputsoption enables you to pass numpyndarrayin files. -
--input_exprsoption enables you to pass Python expressions. -
--input_examplesoption enables you to passtf$train$Example.
--inputs
To pass input data in files, specify the --inputs option, which takes the following general format:
--inputs <INPUTS>
where INPUTS is either of the following formats:
<input_key>=<filename><input_key>=<filename>[<variable_name>]
You may pass multiple INPUTS. If you do pass multiple inputs, use a semicolon to separate each of the INPUTS.
saved_model_cli uses numpy.load to load the filename. The filename may be in any of the following formats:
.npy.npz- pickle format
A .npy file always contains a numpy ndarray. Therefore, when loading from a .npy file, the content will be directly assigned to the specified input tensor. If you specify a variable_name with that .npy file, the variable_name will be ignored and a warning will be issued.
When loading from a .npz (zip) file, you may optionally specify a variable_name to identify the variable within the zip file to load for the input tensor key. If you don’t specify a variable_name, the SavedModel CLI will check that only one file is included in the zip file and load it for the specified input tensor key.
When loading from a pickle file, if no variable_name is specified in the square brackets, whatever that is inside the pickle file will be passed to the specified input tensor key. Otherwise, the SavedModel CLI will assume a dictionary is stored in the pickle file and the value corresponding to the variable_name will be used.
--input_exprs
To pass inputs through Python expressions, specify the --input_exprs option. This can be useful for when you don’t have data files lying around, but still want to sanity check the model with some simple inputs that match the dtype and shape of the model’s SignatureDefs. For example:
<input_key>=[[1],[2],[3]]
In addition to Python expressions, you may also pass numpy functions. For example:
<input_key>=np.ones((32,32,3))
(Note that the numpy module is already available to you as np.)
--input_examples
To pass tf$train$Example as inputs, specify the --input_examples option. For each input key, it takes a list of dictionary, where each dictionary is an instance of tf$train$Example. The dictionary keys are the features and the values are the value lists for each feature. For example:
<input_key>=[{"age":[22,24],"education":["BS","MS"]}]
Save output
By default, the SavedModel CLI writes output to stdout. If a directory is passed to --outdir option, the outputs will be saved as .npy files named after output tensor keys under the given directory.
Use --overwrite to overwrite existing output files.